How Interior Designers and Architects Use AI for Client Presentations — Full Workflow
Most interior designers know the bottleneck by heart. The 3D model is finished, the client meeting is on the calendar, and the only thing standing between the two is the render — the part that disappears for hours, comes back not quite right, and often gets sent out to an outsourcing service for $150 and a 48-hour wait.
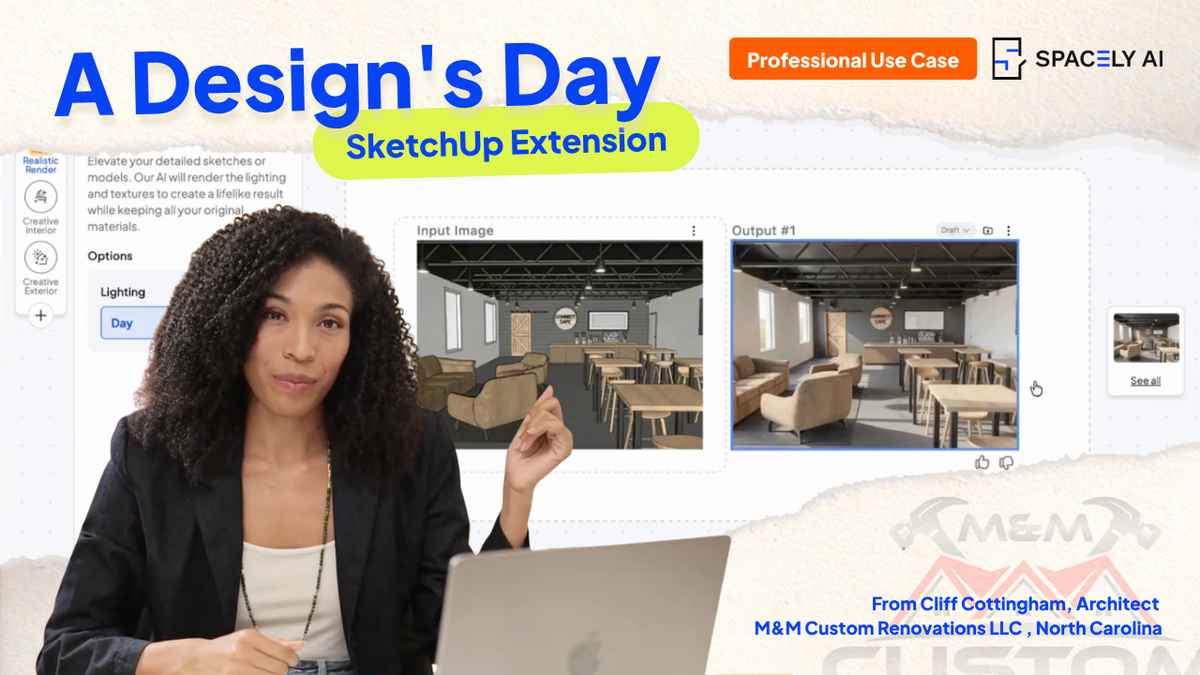
Cliff Cottingham, from M&M Construction in North Carolina, shared one of his client renders with us:
"The renders feel lifelike and better than tools I used before."
— Cliff Cottingham, M&M Custom Renovations LLC
We wanted to show how a render like Cliff's comes together. So in this Designer Spotlight, we walk through the full workflow — from a SketchUp model to a 4K, presentation-ready image — using the same Spacely AI tools and steps that produce client-grade work.
The starting point: a brief and a 3D model
Most interior design projects begin the same way — with a client brief and a 3D model. The client has a space, a budget, and a rough sense of direction. The designer's job is to translate that into something the client can see and react to before any material is ordered or any wall is touched.
The model lives in SketchUp. That's where the geometry is accurate, where the dimensions are real, and where the design decisions have already been made. The model has never been the problem. It's everything that has to happen after the model to make it presentation-quality that creates the bottleneck.
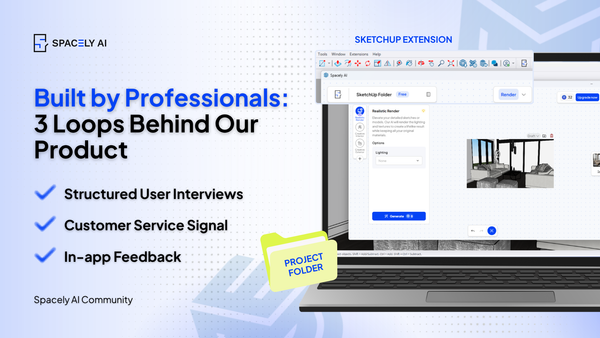
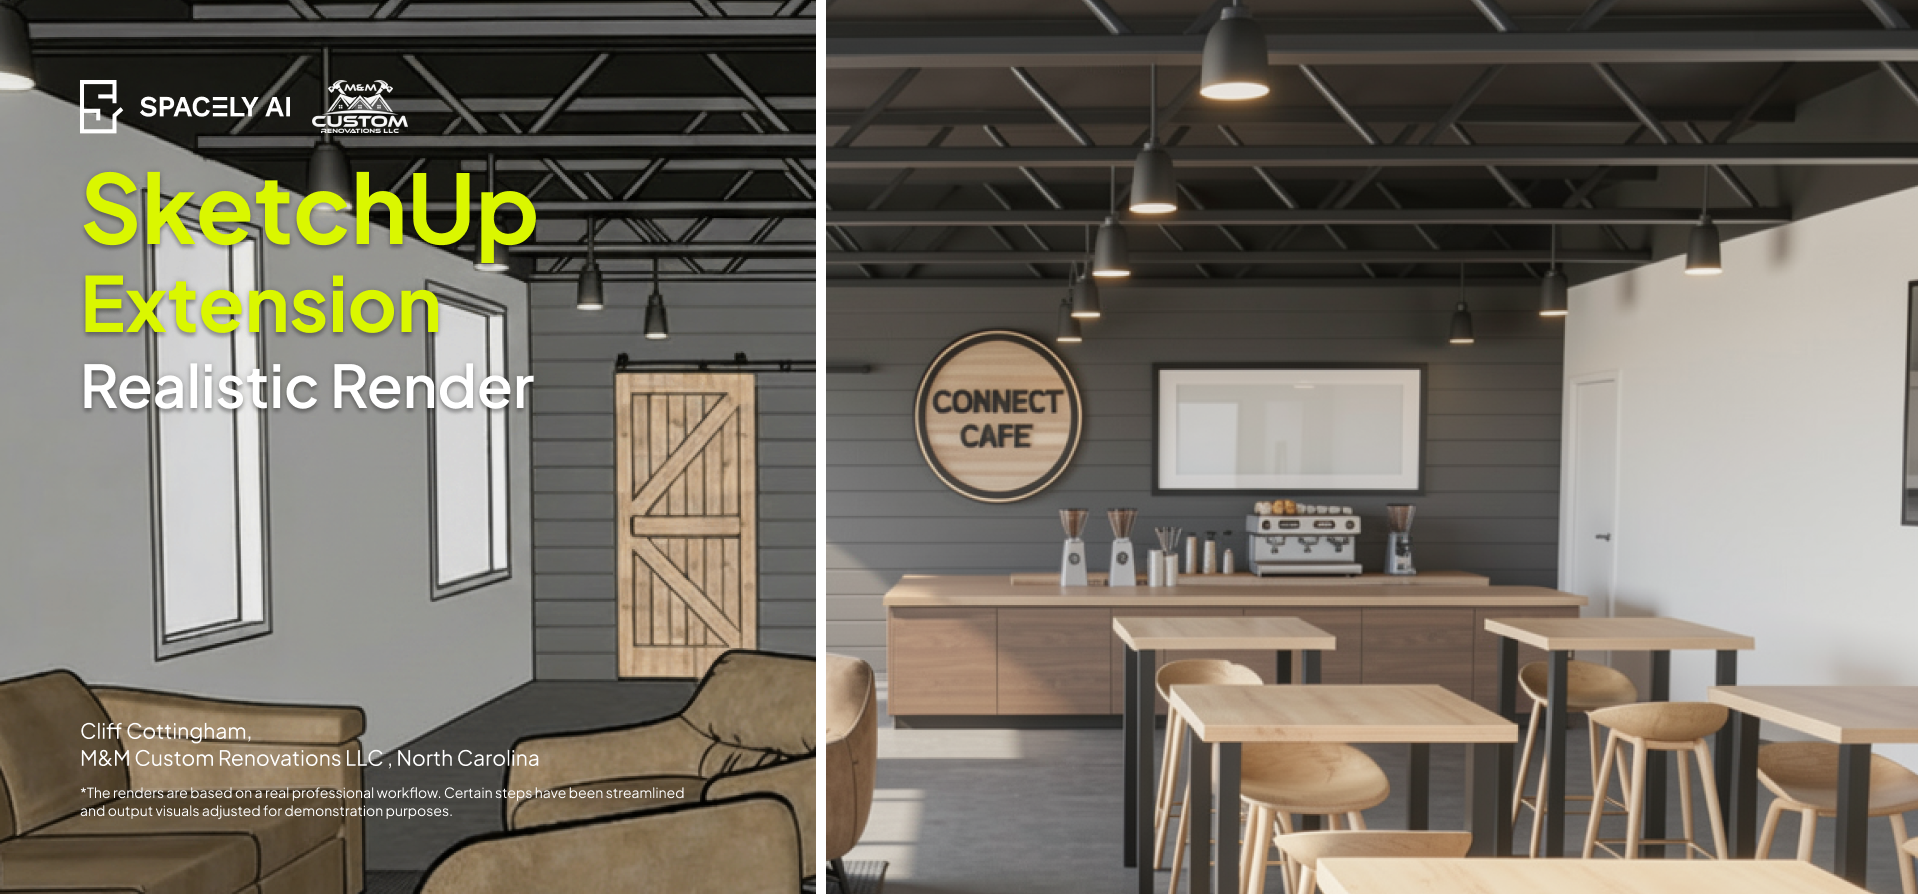
Step 1: From SketchUp model to render — without leaving the model
The first move is the one that used to cost the most time. With the Spacely AI SketchUp Extension, a SketchUp model imports directly into Spacely AI — no exporting image sequences, no jumping between five applications, no rebuilding the scene somewhere else.
The Spacely AI SketchUp Extension is free to install from the SketchUp Extension Warehouse with the full toolkit experience on 2024 and above. For existing Spacely AI users, signing in takes an email and a one-time code — no password to dig up.
Why it matters for client work: The model you already built is the model that gets rendered. The accurate geometry, the spatial relationships, the proportions a client is paying for — all of it carries straight through. You're not recreating your work in another tool. You're continuing it.
Full Tutorial on SketchUp Extension →
Step 2: Realistic Render — concept to photorealistic in minutes
With the model in place, the next step is Realistic Render. This is where a clean but flat 3D concept becomes a photorealistic image — accurate lighting, believable materials, the kind of depth a client reads as "this is what my space will look like."
And here's the detail that defines how designers actually work: the render doesn't demand your attention while it generates. You can move on to other tasks — refining other rooms, reviewing other parts of the project, prepping the rest of the deck. The render works in the background while you keep working in the foreground. The bottleneck stops being a bottleneck when it stops blocking everything else.
Why it matters: This is the part of the old workflow that took hours or got outsourced entirely. Realistic Render compresses it. You set the scene, start the render, and instead of an afternoon evaporating, a presentation-grade image comes back in minutes.
Step 3: Auto Edit and masking — refining materials without starting over
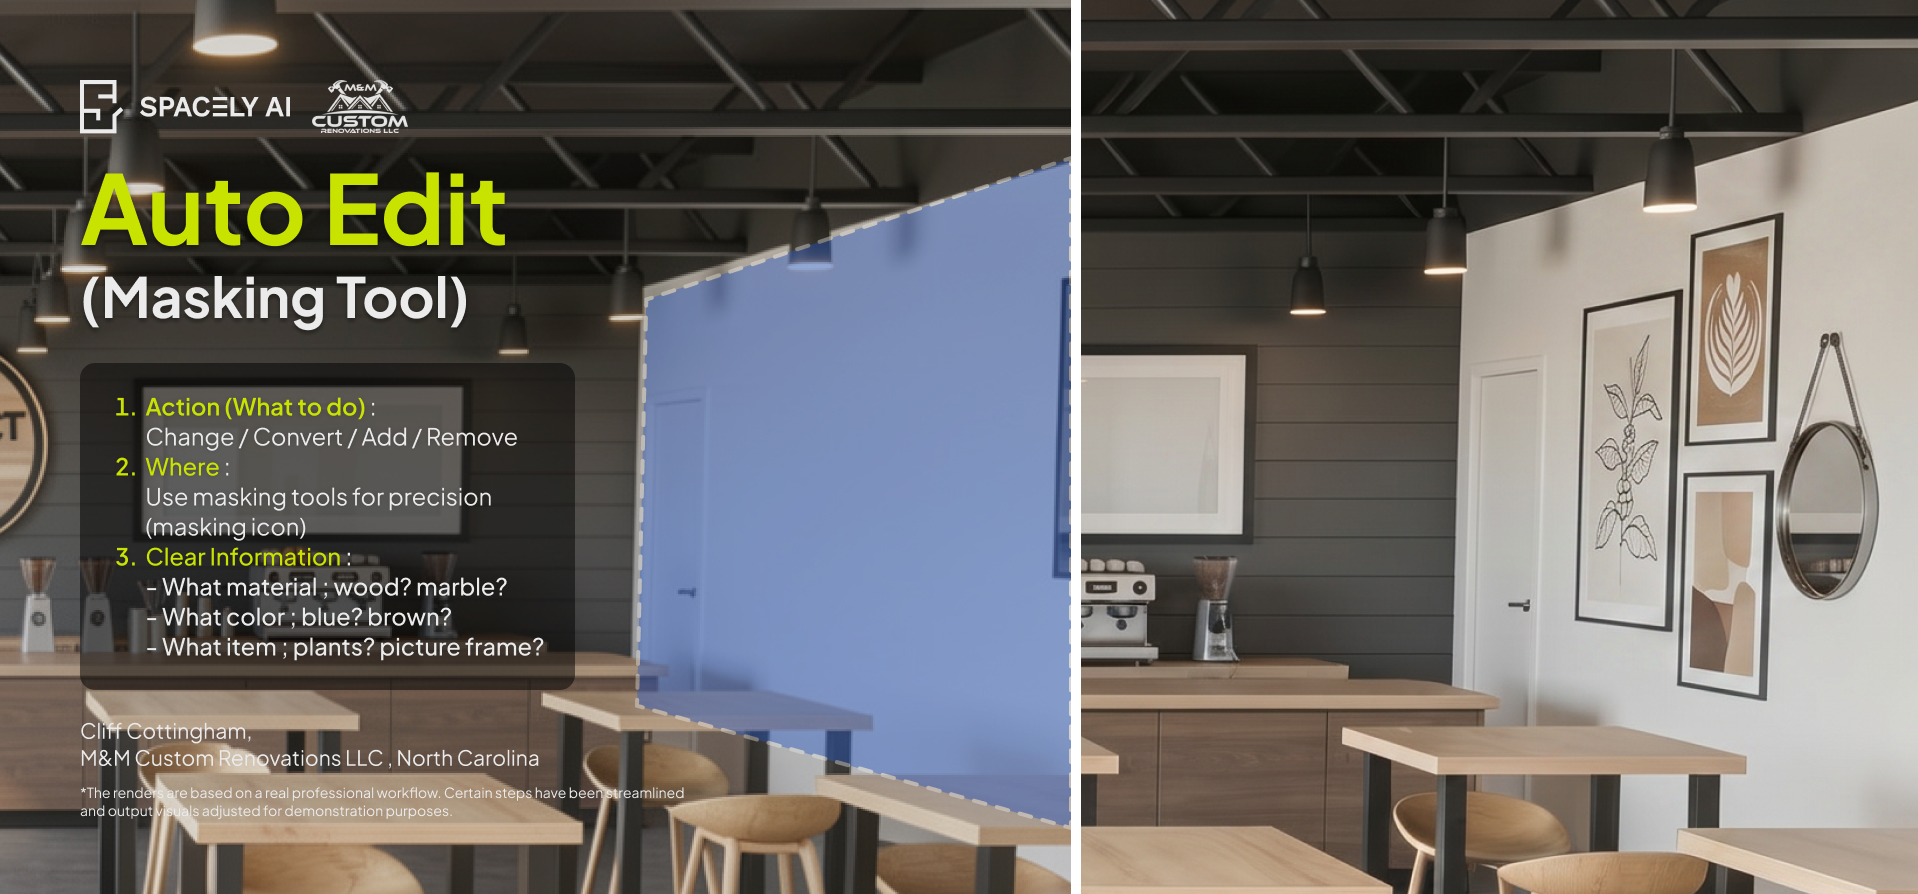
A first render is rarely the final render. A client wants the flooring in a different finish, the cabinetry in a warmer tone, one wall in a different material. In the old workflow, that meant re-rendering the entire scene — and waiting all over again.
Auto Edit with masking changes that. You mask the specific element you want to adjust — a surface, a material, a finish — and refine just that, leaving the rest of the render untouched. The lighting holds. The composition holds. Only the thing you chose to change, changes.
Why it matters: This is controlled iteration, and it's where designers keep their authority over the work. The creative direction stays yours. Spacely AI handles the execution of a specific, intentional change — not a wholesale regeneration that forces you to gamble the whole image to fix one detail.
Step 4: Enhance Quality 4K — preparing for the client deck
The final step before the work leaves your hands is resolution. A render that looks sharp on screen can fall apart when it's blown up in a client presentation or printed for a proposal. Enhance Quality 4K upscales the image to presentation resolution — clean, sharp, and ready to sit in a deck without anyone squinting.
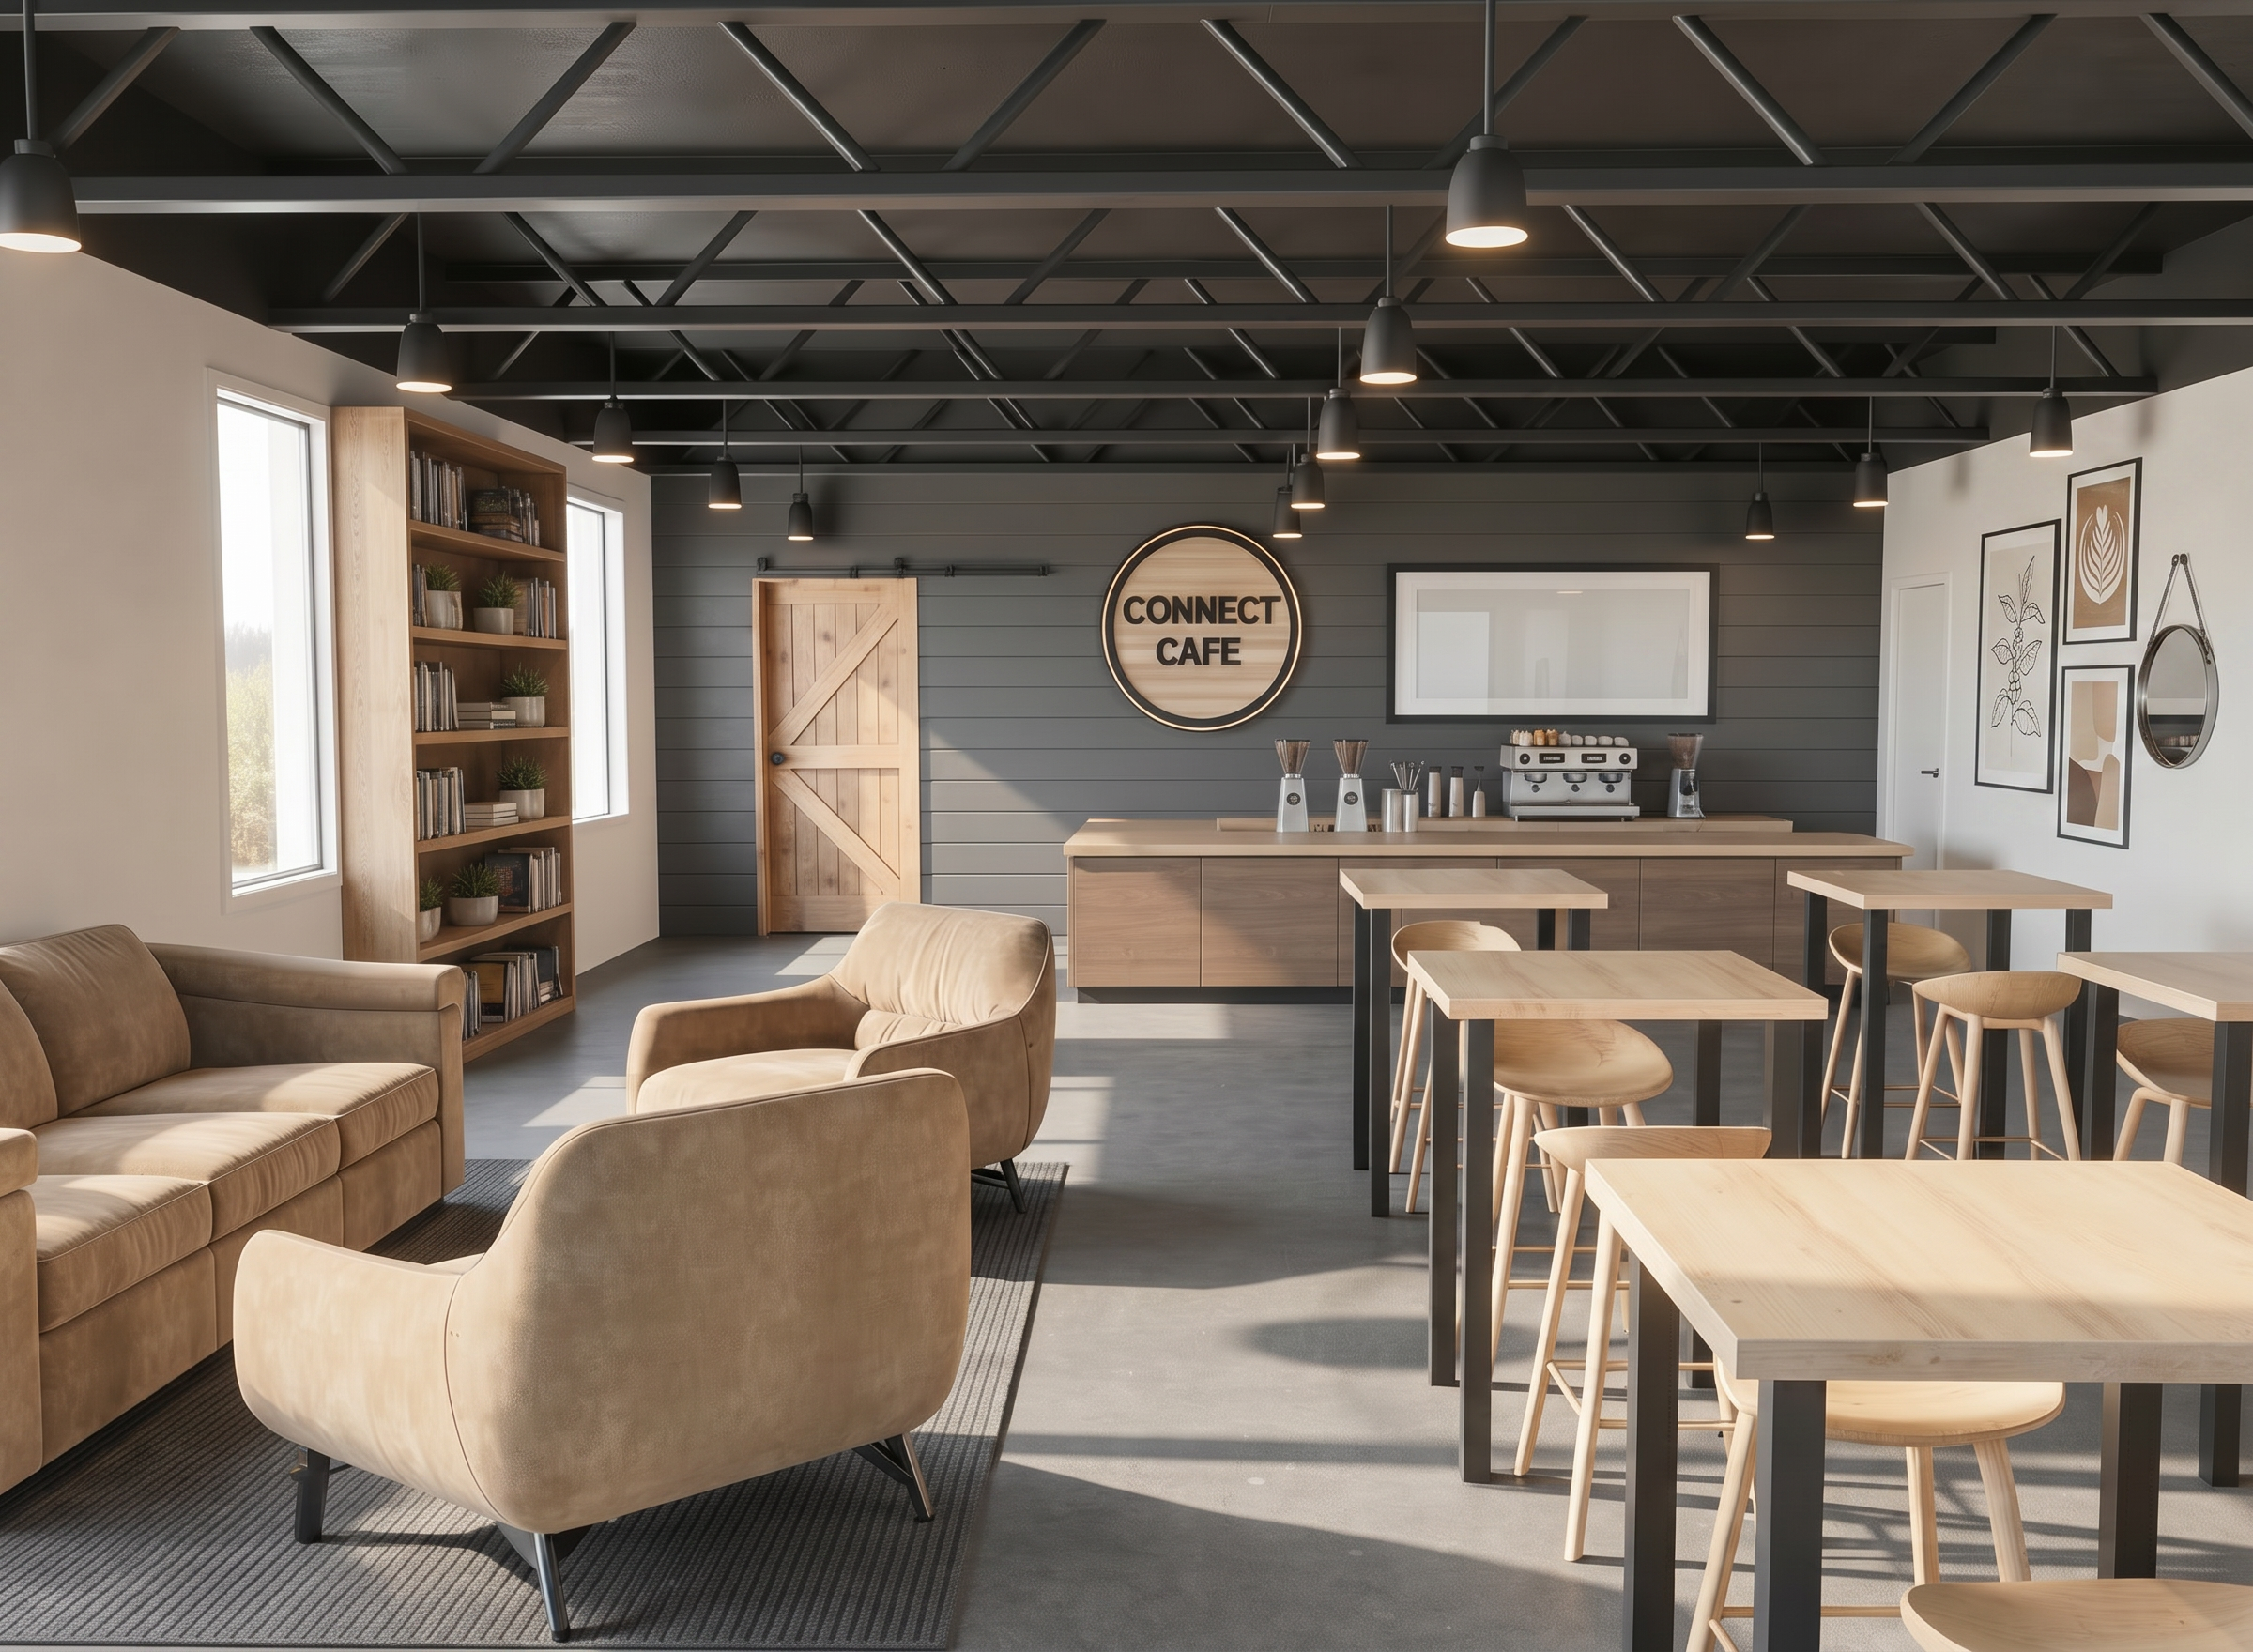
Why it matters: This is the difference between "an AI image" and "a deliverable." The 4K output is what makes a render client-ready — the standard the entire workflow is built to hit.
That's the shift this workflow represents: not replacing the designer's judgment, but removing the wait between having an idea and being able to show it. Renders like Cliff Cottingham's are what that looks like in practice — client-grade output, produced inside the designer's own process.
Tips from Spacely AI: Personalized Tool Tab
Between the heavy lifting, the workspace itself can be set up around the tools you reach for most — arranging the sidebar so they're one click away. It's a small thing that compounds. When the same five tools drive 90% of a project, having them where you expect them turns a workflow into muscle memory.
Try the workflow yourself
Spacely AI is the spatial design platform behind the workflow — from SketchUp model to client-ready render, in one workspace.
Free to try: spacely.ai
Explore the tools: spacely.ai/tools
For more information and media inquiries, please contact
Website: spacely.ai
Facebook: facebook.com/spacelyai
Instagram: instagram.com/spacely.ai
Email: hello@spacely.ai