Mastering AI Masking and Settings in Spacely AI for Precision Design
Introduction to AI Masking: Explain what masking is and how it can be used to refine designs.
- Introduction to AI Masking: Explain what masking is and how it can be used to refine designs.
- Using AI Controls: Detailed guidance on navigating and utilizing various AI settings.
- Advanced Parameter Adjustment: Teach users how to tweak advanced settings for optimal outcomes.
- Interactive Examples: Provide interactive scenarios where users can see the effects of different settings.
- Troubleshooting Common Issues: Help users solve common problems related to masking and settings.
What is Masking?
Masking is a powerful tool used in digital design that allows you to selectively modify and enhance specific areas of an image without affecting the rest. This technique is particularly useful in interior design, where precision and detail are paramount.
What is an AI Masking?
At its core, AI masking involves creating a “mask” — a layer that defines which parts of an image can be edited and which parts remain unchanged. Imagine you’re painting a wall but want to keep the moldings and windows untouched; a mask would be like the painter’s tape that protects these areas.
In the context of interior design, AI masking allows designers to apply changes to specific elements of a room — such as walls, furniture, or fixtures — without altering the rest of the space. This targeted approach enables designers to experiment with different colors, textures, and materials quickly and efficiently.


An image of a living room (left), A mask image highlighting the ceiling lamp area (middle), The result using the prompt “a black contemporary lamp (right)
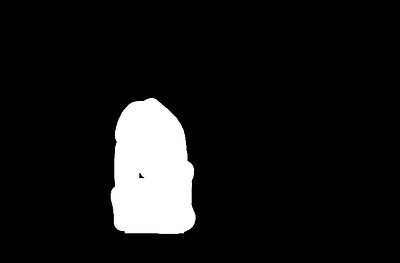
An image of a living room (left), A mask image highlighting the log desk and vast (middle), The result using the prompt “a dark wooden coffee table” (right)
How can I use AI Masking in Spacely AI?
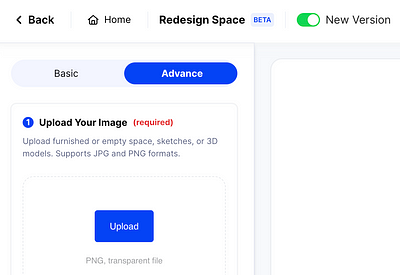
- You can use AI Masking in the “Redesign Space.” feature and turn on New version and select “Advance” mode.
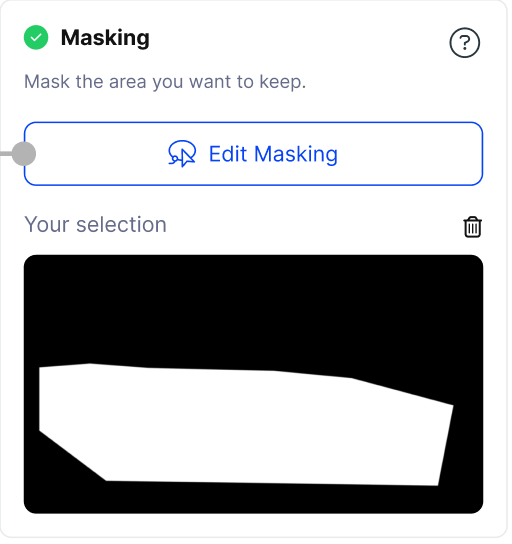
- Once you’re in the Redesign Space, look for the “Masking” option in the toolbar.
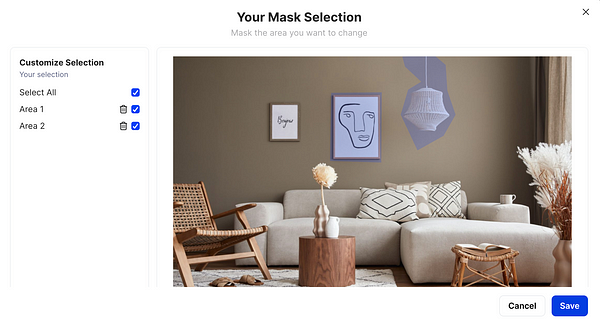
- Click on “Customize Selection” within the Masking option to start tailoring your area.
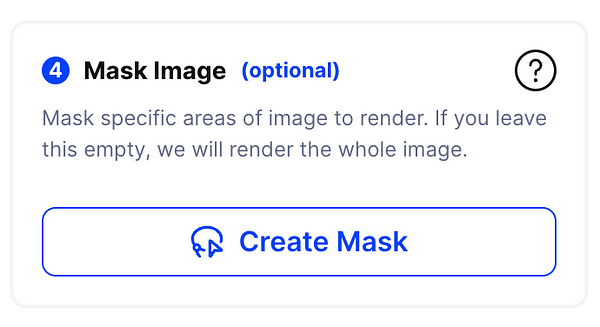
- Click on “Create Mask” within the Masking option to start tailoring your area. Then, use the “lasso tools” to select the area you wish to change.
- After you’ve outlined the desired area, click “Save” to finalize your selection.
The mask you create will appear in the masking menu, ready to be used to generate your design.
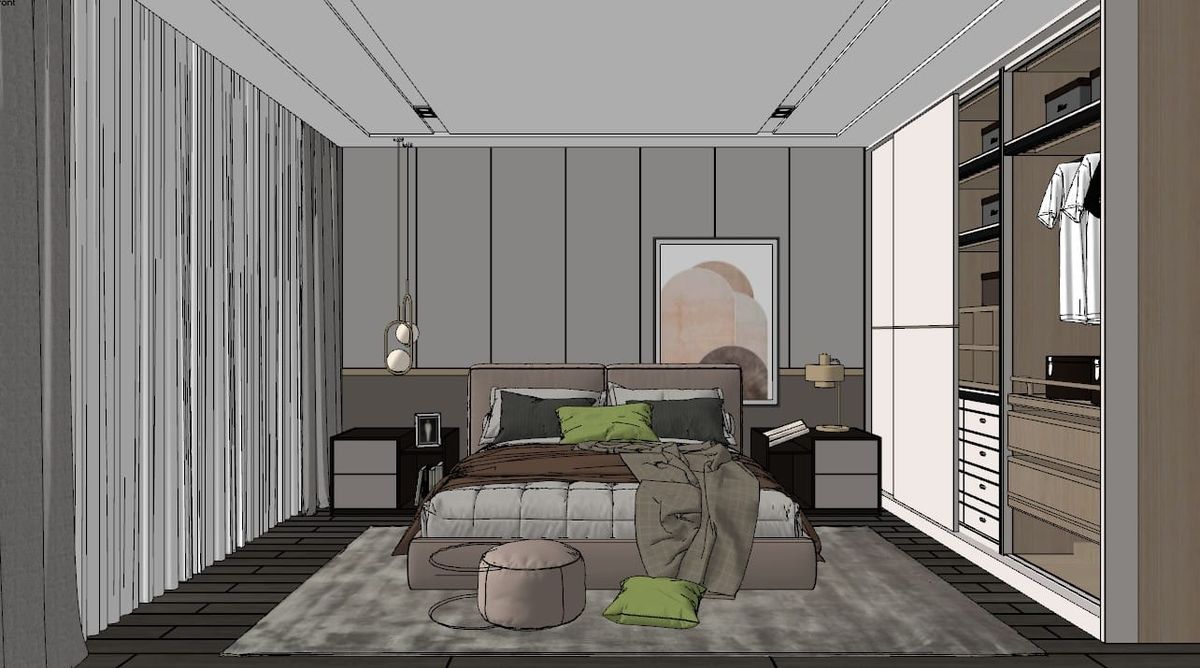
Turn on New version and select Advance mode (left), Masking menu (middle), Use lasso tool to mask your area (right)
What is Spacely AI Redesign Space?
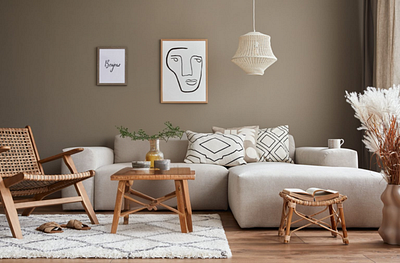
Redesign Space is a feature within Spacely.ai that allows you to transform any room image into your desired style. With a variety of customizable settings, you can fine-tune your renderings to achieve the best possible results. This tool empowers you to experiment with different aesthetics and materials, ensuring your design visions are beautifully and accurately brought to life.
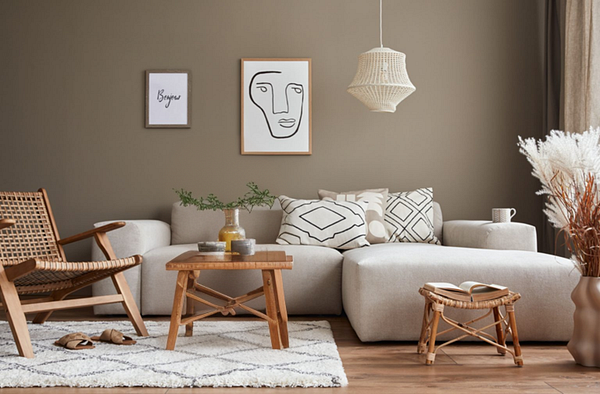
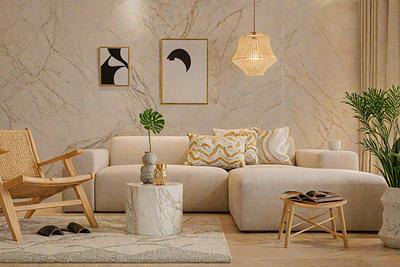
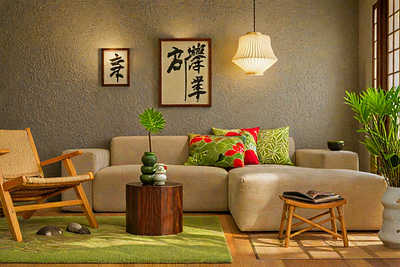
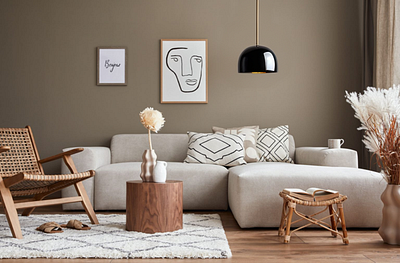
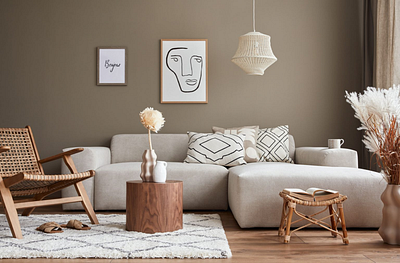
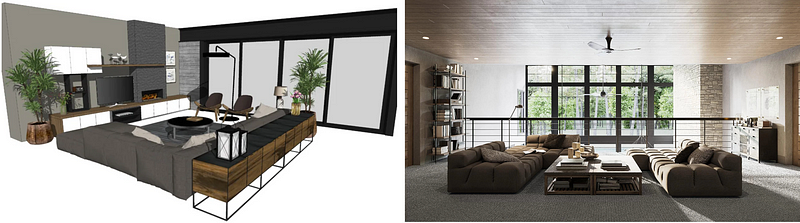
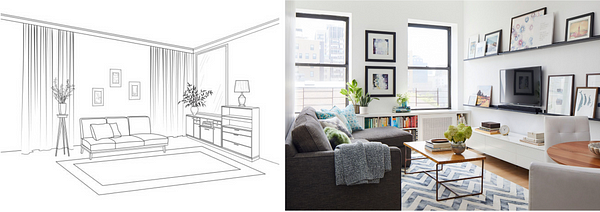
Original image (left), Minimalist living room with marble wall (middle), Modern Japanese-style room with zen principles, dark wood, and green decor (right)
How to Use Redesign Space and What Does Each Setting Do?
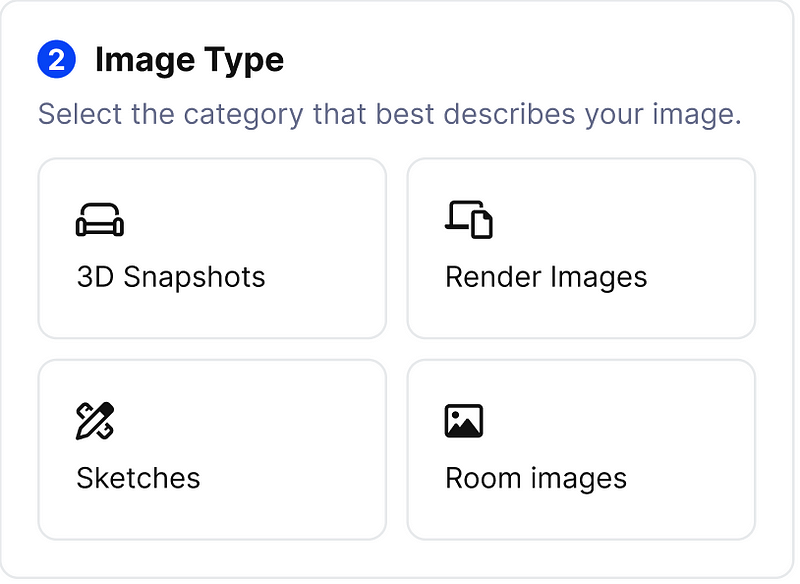
- Upload Your Image and Select Image Type: Redesign Space allows you to upload and render your own images. Begin by uploading an image; you can choose from one of four types: 3D Snapshot, Render Image, Sketch, or Room Image. Selecting the correct type is crucial as it helps the AI accurately understand and process the image according to its characteristics.
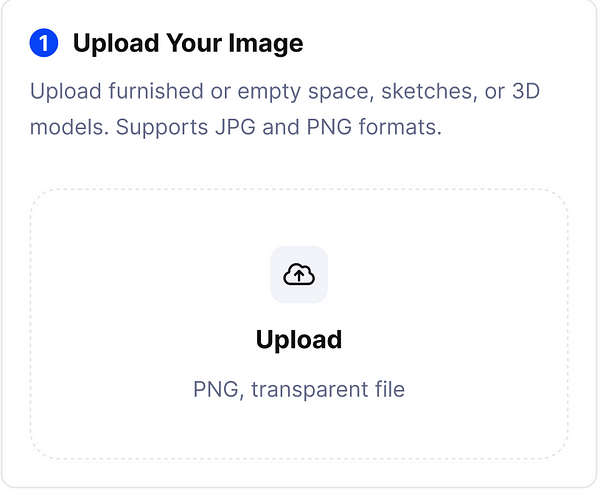
Step 1: Upload image
Step 2: Select Image Type: Choose from a 3D model snapshot, rendering, sketch, or realistic photo in JPG or PNG format.
2. Write a Prompt and a Negative Prompt: Describe what you want your final result to look like using a detailed prompt. Be specific about the styles, colors, and elements you wish to include. Simultaneously, write a negative prompt to specify what you want to exclude from the final render. This could include certain materials, colors, or design elements that you do not wish to appear.
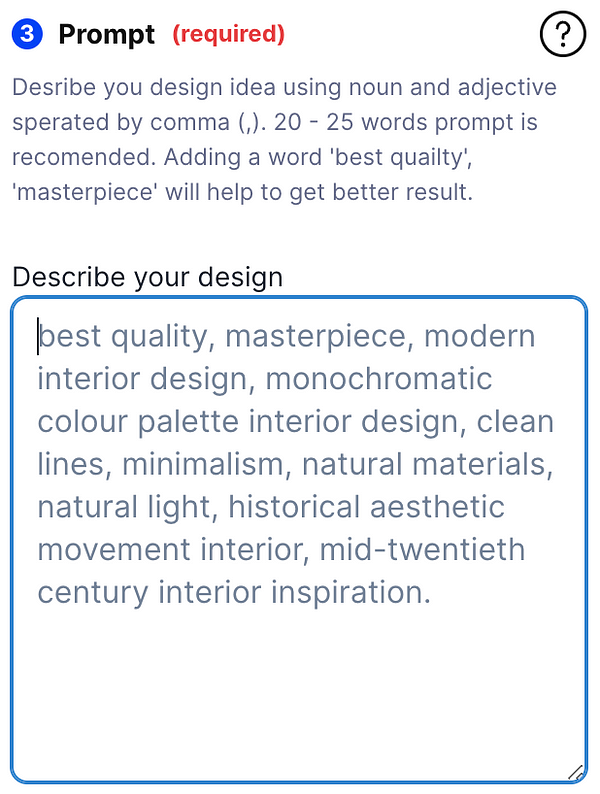
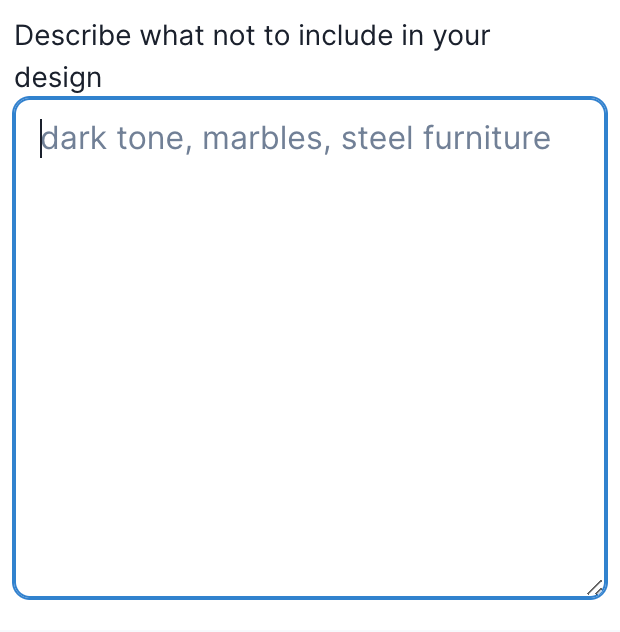
Step 3: Describe your result image
3. Draw Your Mask: Optionally, you can draw a mask to select specific areas of the image you want to modify, leaving the rest unchanged. This tool is useful if you wish to focus changes on particular elements without affecting the entire image. For a detailed guide on using this feature effectively, please read “How to Use AI Masking in Spacely AI.”
4. Adjust the Advanced Settings: Optionally, you can fine-tune the advanced settings to match your preferences and optimize your results. We offer four advanced settings that you can adjust. We will go through each one to explain how they affect the resulting image.
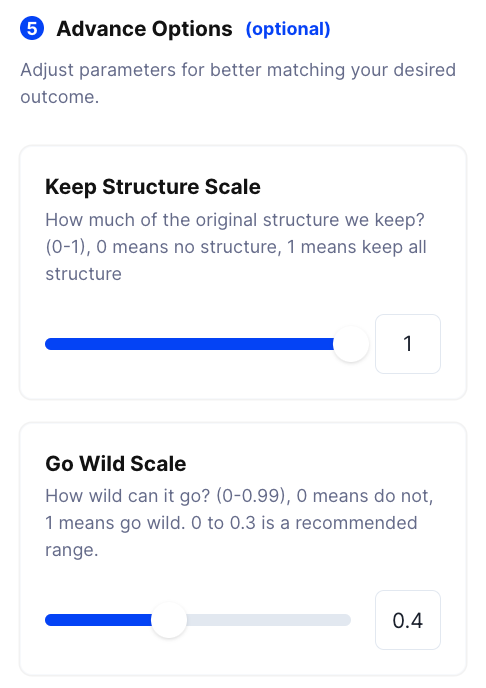
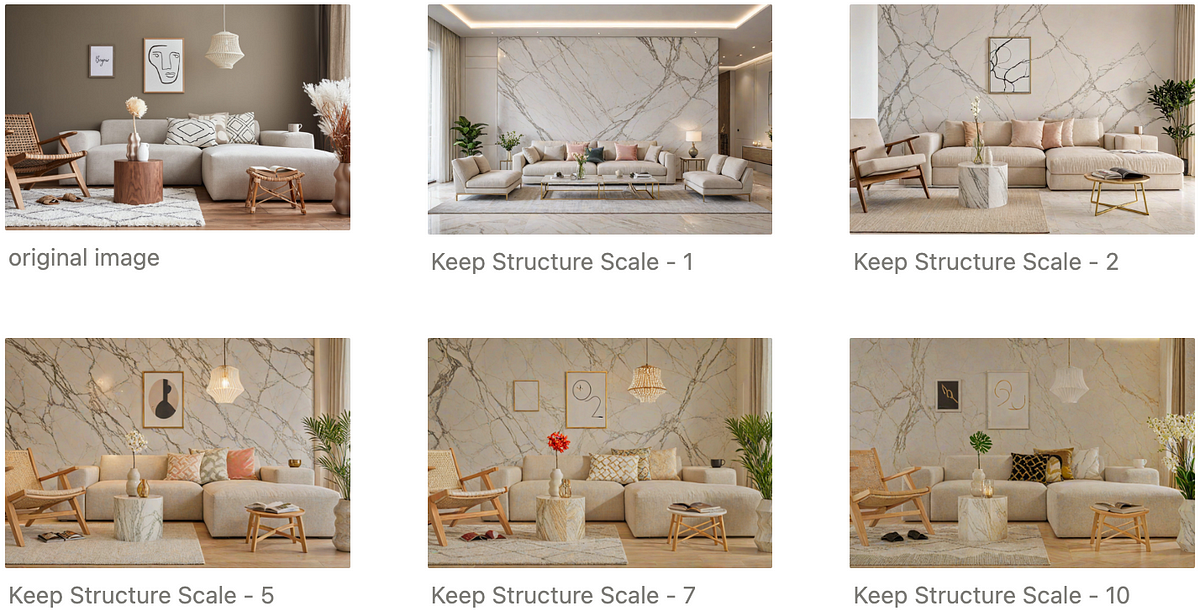
- Keep Structure Scale (0–10): This setting controls how closely your result adheres to the structure and patterns of your original image. A setting of 10 means the AI will strictly maintain the original layout and architectural details, making the final render very accurate to your initial photo. Conversely, a setting of 0 allows the AI to deviate completely, potentially transforming the space into something entirely new.
- Example Prompt: “a modern living room, minimalist style, marble, light color”
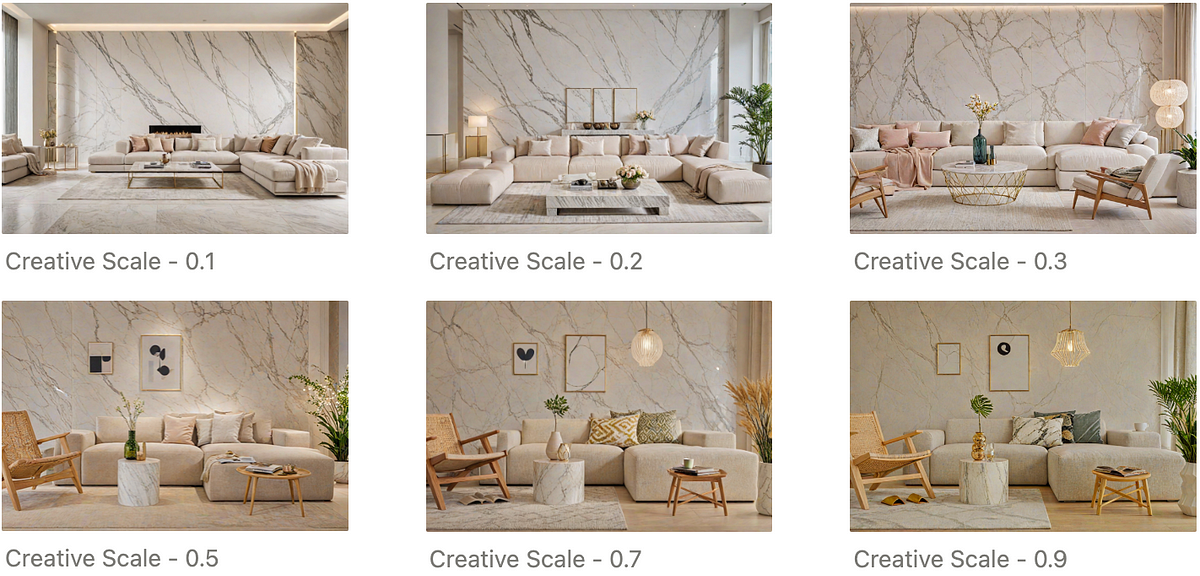
- Go Wide Scale or Creative Scale (0–0.99): This setting determines the balance between maintaining the original structure and allowing creative freedom during the image generation process. Our AI generates an image in steps; this scale specifies how many steps should adhere to the original structure before the AI begins to introduce creative variations. A higher value means more steps will focus on structural integrity, while a lower value increases the AI’s freedom to innovate and deviate from the original layout.
- Example Prompt: “a modern living room, minimalist style, marble, light color”
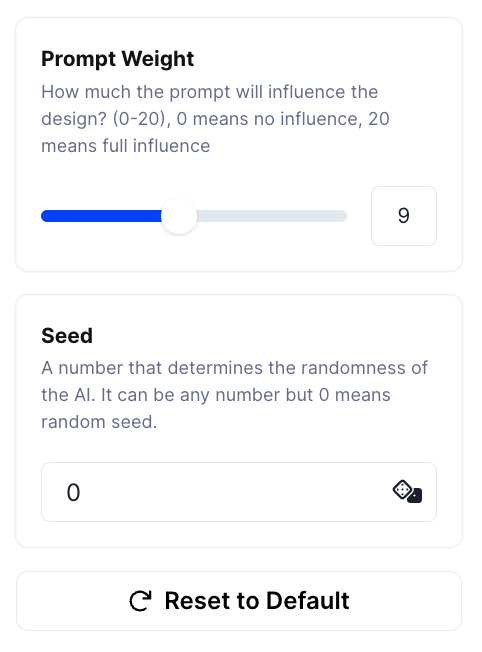
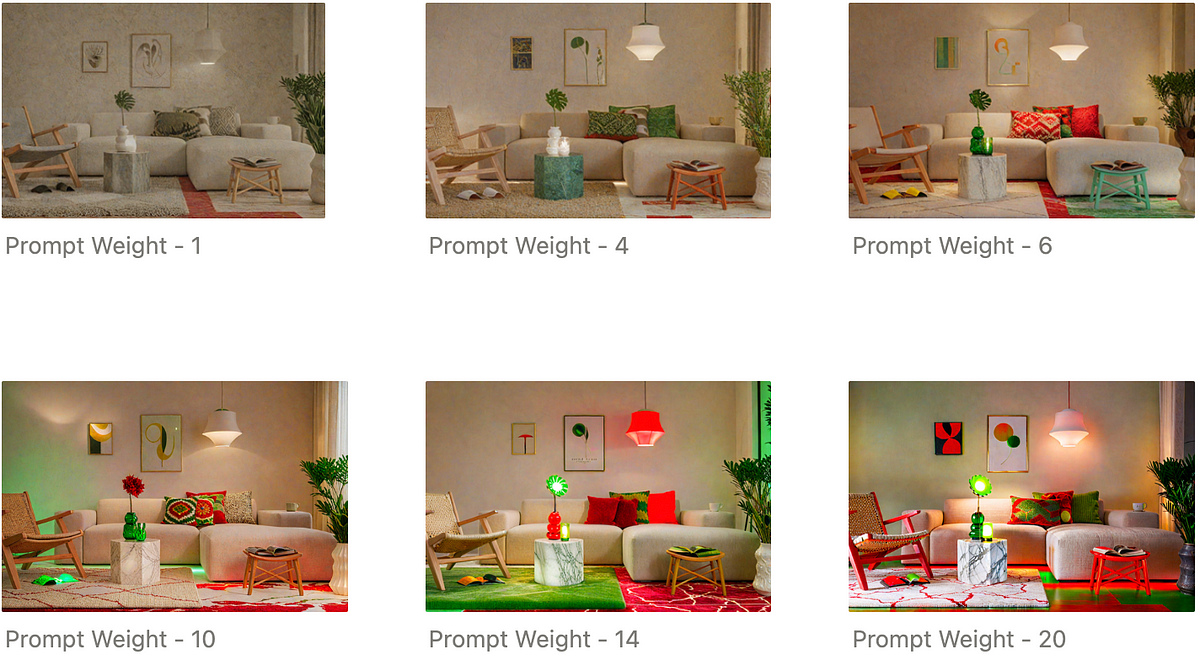
- Prompt Weight (0–20): This setting controls the degree to which the AI adheres to the details specified in your prompt. A setting of 20 means the AI will closely follow every detail of the prompt, striving to capture all specified elements in the render. Conversely, a setting of 0 indicates that the AI will take a more general approach, interpreting the prompt loosely and generating a broader interpretation of the design.
- Example Prompt: “a modern living room, minimalist style, marble, light color, red wool floor, green light lamp”
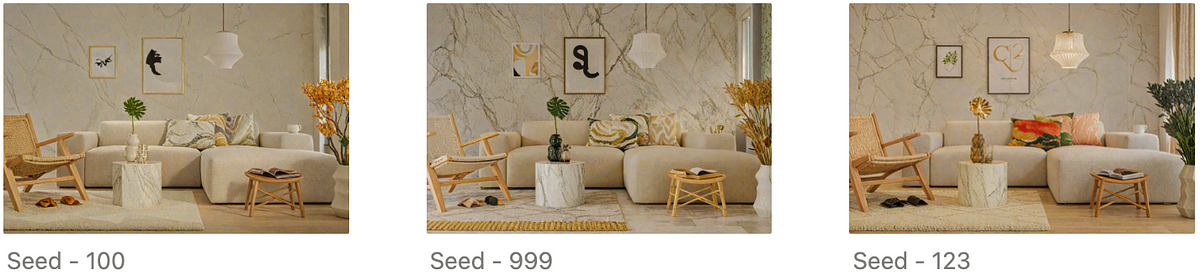
- Seed: This use to indicate a random state of the AI, meaning if you use the same seed with the same setting you will get the same result most of the time. So it might be a good idea to try to mess around with the seed to get a varaition of the result.
- Example Prompt: “a modern living room, minimalist style, marble, light color”
Troubleshooting Common Issues?
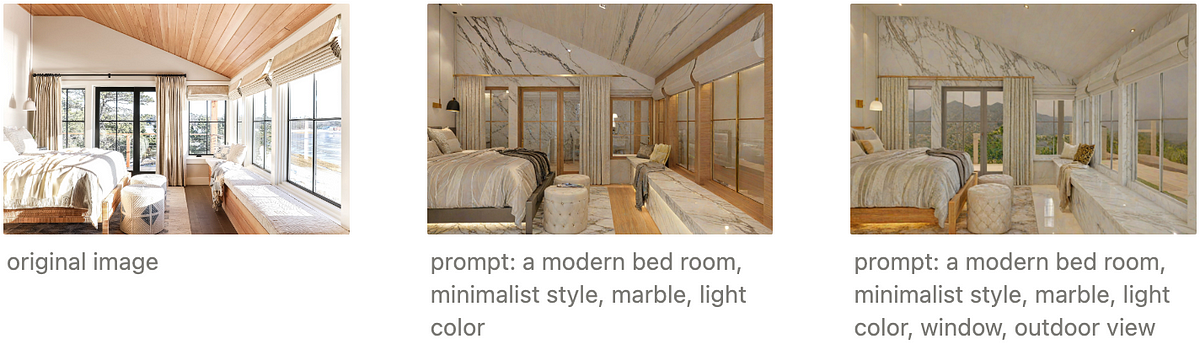
- Missing Window: In rooms with multiple windows, the model might not always recognize that the windows offer a view of the outside. To enhance the accuracy of the render, specifically adding terms such as “window” or “outdoor view” in your prompt can significantly improve the results. This helps ensure that the AI correctly interprets these features and includes realistic outdoor scenery in the render, mirroring the original image’s perspective.
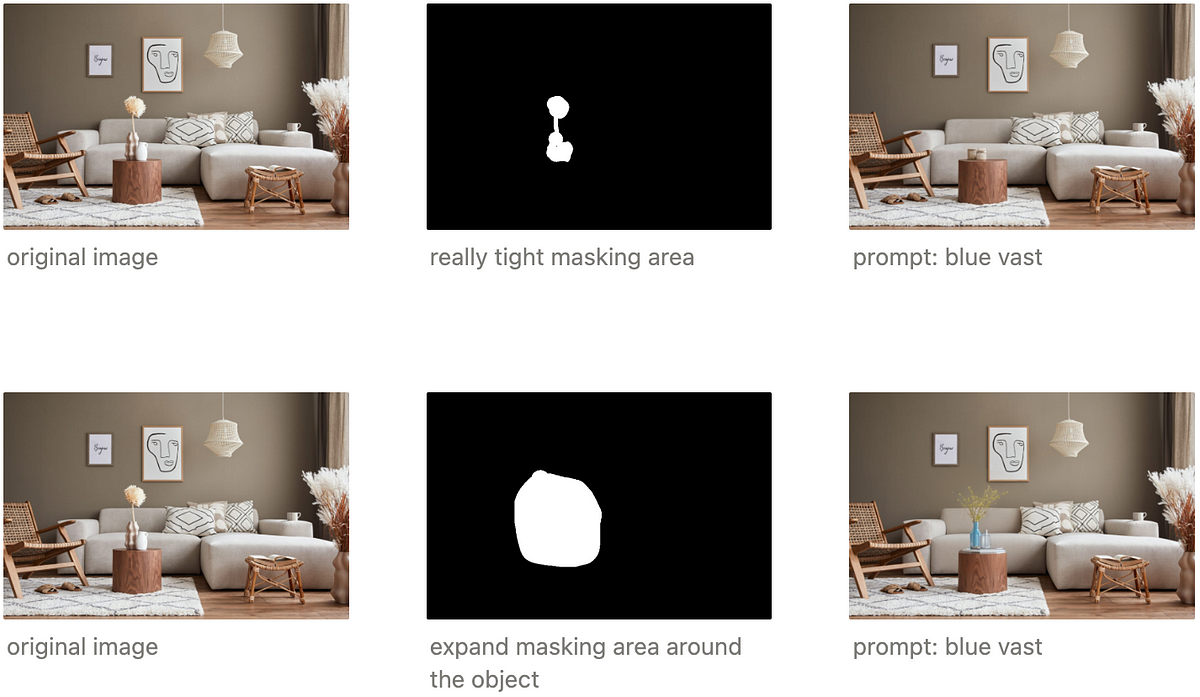
2. Item is not changing: When using masking to alter an object within your design and noticing no changes or incorrect changes, it’s beneficial to extend the mask slightly beyond the immediate area of the object. This gives the AI additional space to seamlessly blend and replace the object within the context of the surrounding environment.
In conclusion, mastering AI masking and settings in Spacely AI provides you with the tools needed for precision in design. From understanding the basics of AI masking to tweaking advanced parameters, this guide has walked you through enhancing your design workflow.
For further questions or support, feel free to contact us at support@spacely.ai Happy designing!
Join Spacely AI in this exciting journey to redefine spatial design. Discover the transformative potential of the enterprise’s API solutions and become part of Spacely AI.
For more information and media inquiries, please contact:
Website: spacely.ai
Facebook: facebook.com/spacelyai
Instagram: instagram.com/spacely.ai
Email: hello@spacely.ai